This project use WebServer library to host a GPIO control and monitoring web page.
Known Issues
- This WebServer response synchronously. It could miss massages when you request frequently.
Use ESPAsyncWebServer may solve this issue.
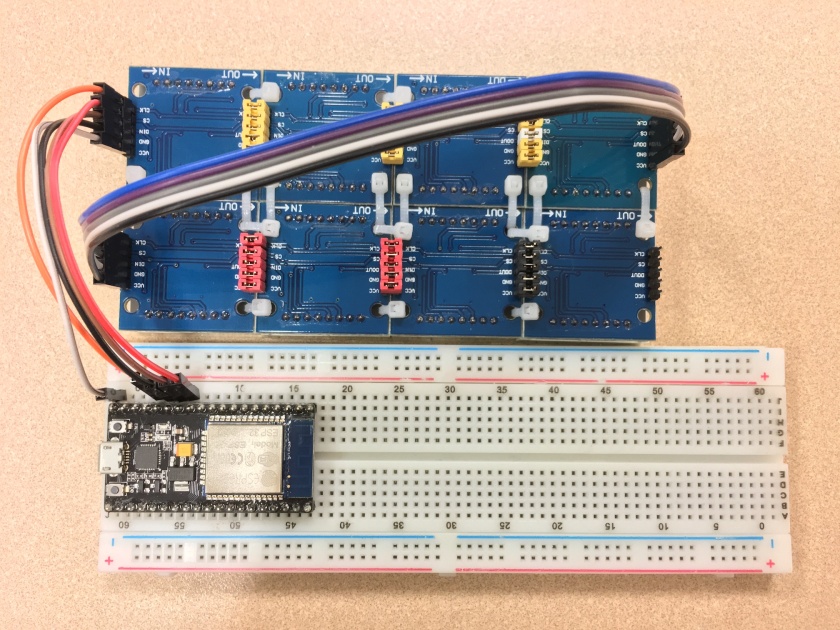
Hardware
- ESP-01s
- LEDs
Software
- Arduino IDE
- ESP8266 on Arduino
Arduino ESP8266 WebServer library(Included in ESP8266 on Arduino)- Arduino ESP8266 filesystem uploader
Code
.
├── GPIO-8266.ino
└── data
    └── demo.html
Procedure
- Open “GPIO-8266.ino" and custom your code contained wifi info:
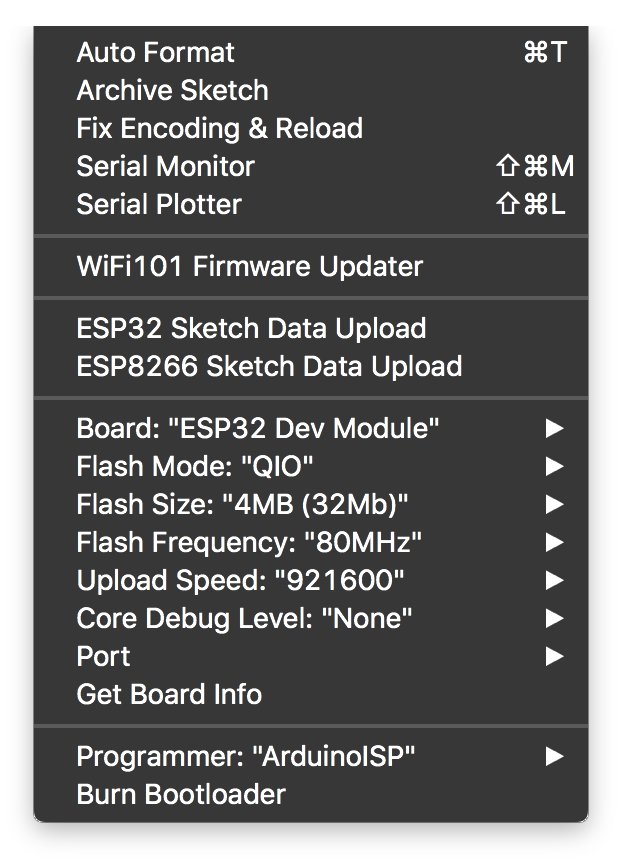
// Modify these as you need const char* ssid = "41a iPhone"; const char* password = "********"; - Upload the GPIO-8266.ino with following config
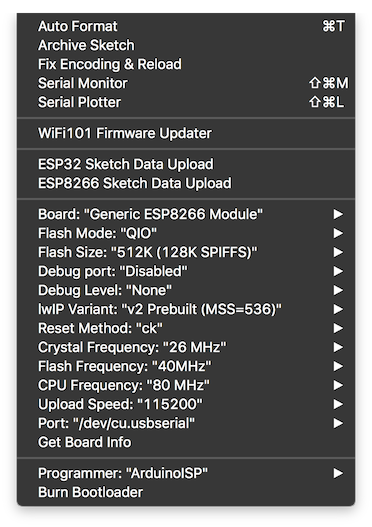 
 - Upload data by clicking Tools -> ESP32 Sketch Data Upload.
Wait until upload done.
- Make sure your Wi-Fi hotspot is available.
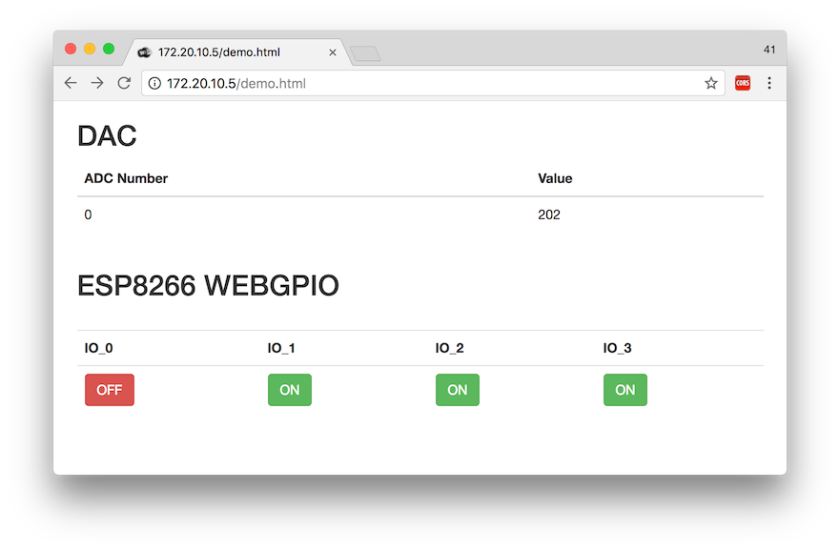
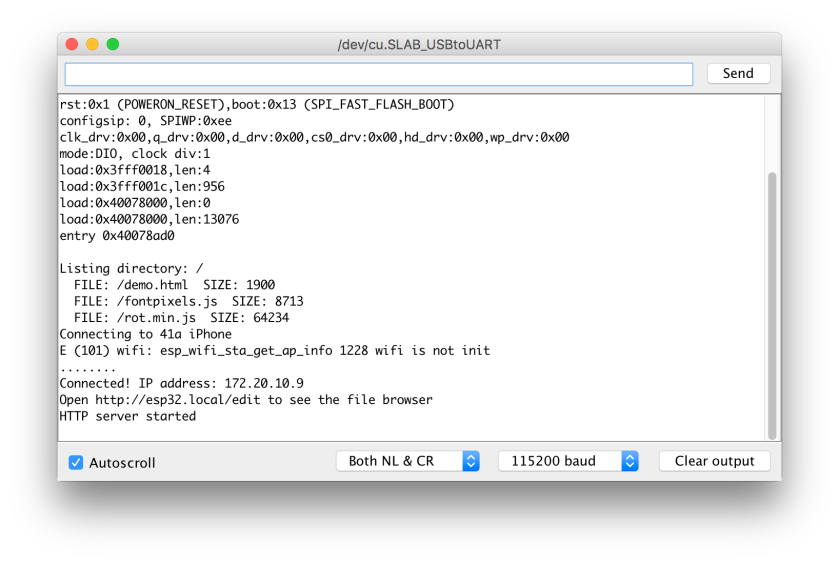
Connect your Mac/PC to the Wi-Fi. Then open any browser, enter “http://esp8266.local/demo.html" in the URL. (Or http://ip/demo.html). ESP8266’s IP will show in Serial Monitor when it connect to your Wi-Fi.
Screenshot